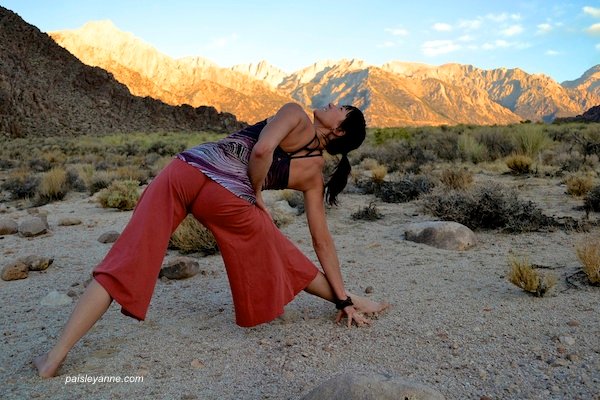
Triangle Pose: 4 Refinements to Help You Improve
Triangle pose, or Trikonasana in sanskrit, has a myriad of beneficial effects. Some of them are that it: stretches and tones our legs, reduces pain in the low back, removes stiffness in our hips, opens the chest and lungs, and builds strength and freedom in the neck. Here are a few options to refine your pose so you can go even deeper and reap the benefits.
Forearm Against Shin
Whether your bottom hand is on a block or the floor, move it so that your wrist is in contact with your outer shin. This contact, when pressed into, provides energy to root down through the mound of your big toe which brings stability and enhances the stretch in your front leg. Simultaneously, this action gives leverage to help you roll your bottom shoulder back, open your chest and lengthen your spine. Using your upper back will also relieve neck pain (but if your neck really hurts, look down at your foot). Here are the actions:
- Sweep your bottom arm, forward, against your leg.
- Put more weight on the big toe edge of your front foot, then straighten your leg.
- Think of your arm like a teeter-totter; press your hand forward and move your shoulder back.
- Rotate your bottom shoulder externally (away from your leg).
- Lift your chest towards your chin.
Lift the Ball of Your Front Foot
Two common leg misalignments in Triangle pose are to either 1.) hyper-extend the knees or 2.) not straighten the front leg enough. Both of these tendencies can be remedied by lifting the ball of the front foot off the ground. Doing so engages the muscles all around your leg which protects your knee. Rocking onto your heel also helps integrate your femur (thigh bone) more safely and deeply in your pelvis. This connects the power of your legs to your torso which helps your turn your pelvis, spine and chest more fully into the pose. Here are the actions:
- Once you are in Trikonasana, place your top hand on your hip and look down at your front leg.
- Lift the ball of your front foot so that your weight rocks onto your heel.
- Notice how the muscles of your leg are working more powerfully and, perhaps, the sensation of your femur plugging into your pelvis.
- Memorize the way it feels to have your leg working more powerfully and integrated.
- Then, keep the work in your leg, and stretch through the ball of your foot and toes to put your foot back on the ground.
Bend Your Elbows
Begin your pose with your elbows slightly bent. This will give access to the muscles of the upper back. When you use them, you can more easily back bend, open your chest, curl your shoulders back, relieve neck pain and lengthen your spine. Once you go deeper, keep your new alignment, then stretch your arms straight again. The actions are:
- Come into the pose, bend both elbows a little and broaden across your chest.
- Draw your shoulder blades down and into the back of your heart.
- Curl deeper into a backbend and lift your chest towards your chin.
- Extend through the crown of your head.
- Without losing all of the alignment you just created, stretch your arms back to straight.
Wrap Your Top Arm
This is a great way to adjust yourself in Triangle pose. With your top arm wrapped around your back, you can press into the top of your front thigh. Not only does this deepen your thigh bone back into your pelvis (read above for more on that), it manufactures more length in your back and sides and helps tuck your front hip under. Try it like this:
- Wrap your top arm around your back.
- Grab your front thigh. Your pinky will be at the crease of your hip.
- Push strongly into your leg to move your femur away from your head.
- Press more n the pinky finger side of your palm to help tuck your front hip down.
- Keep pushing into your leg and create more length in your top side body.
- Keep the length and roll your shoulder back to turn your chest more open in the pose.
- Either remain as is or keep the alignment and return your top arm to vertical.